DIY Chicken Tractor

Why Use a "Tractor"?
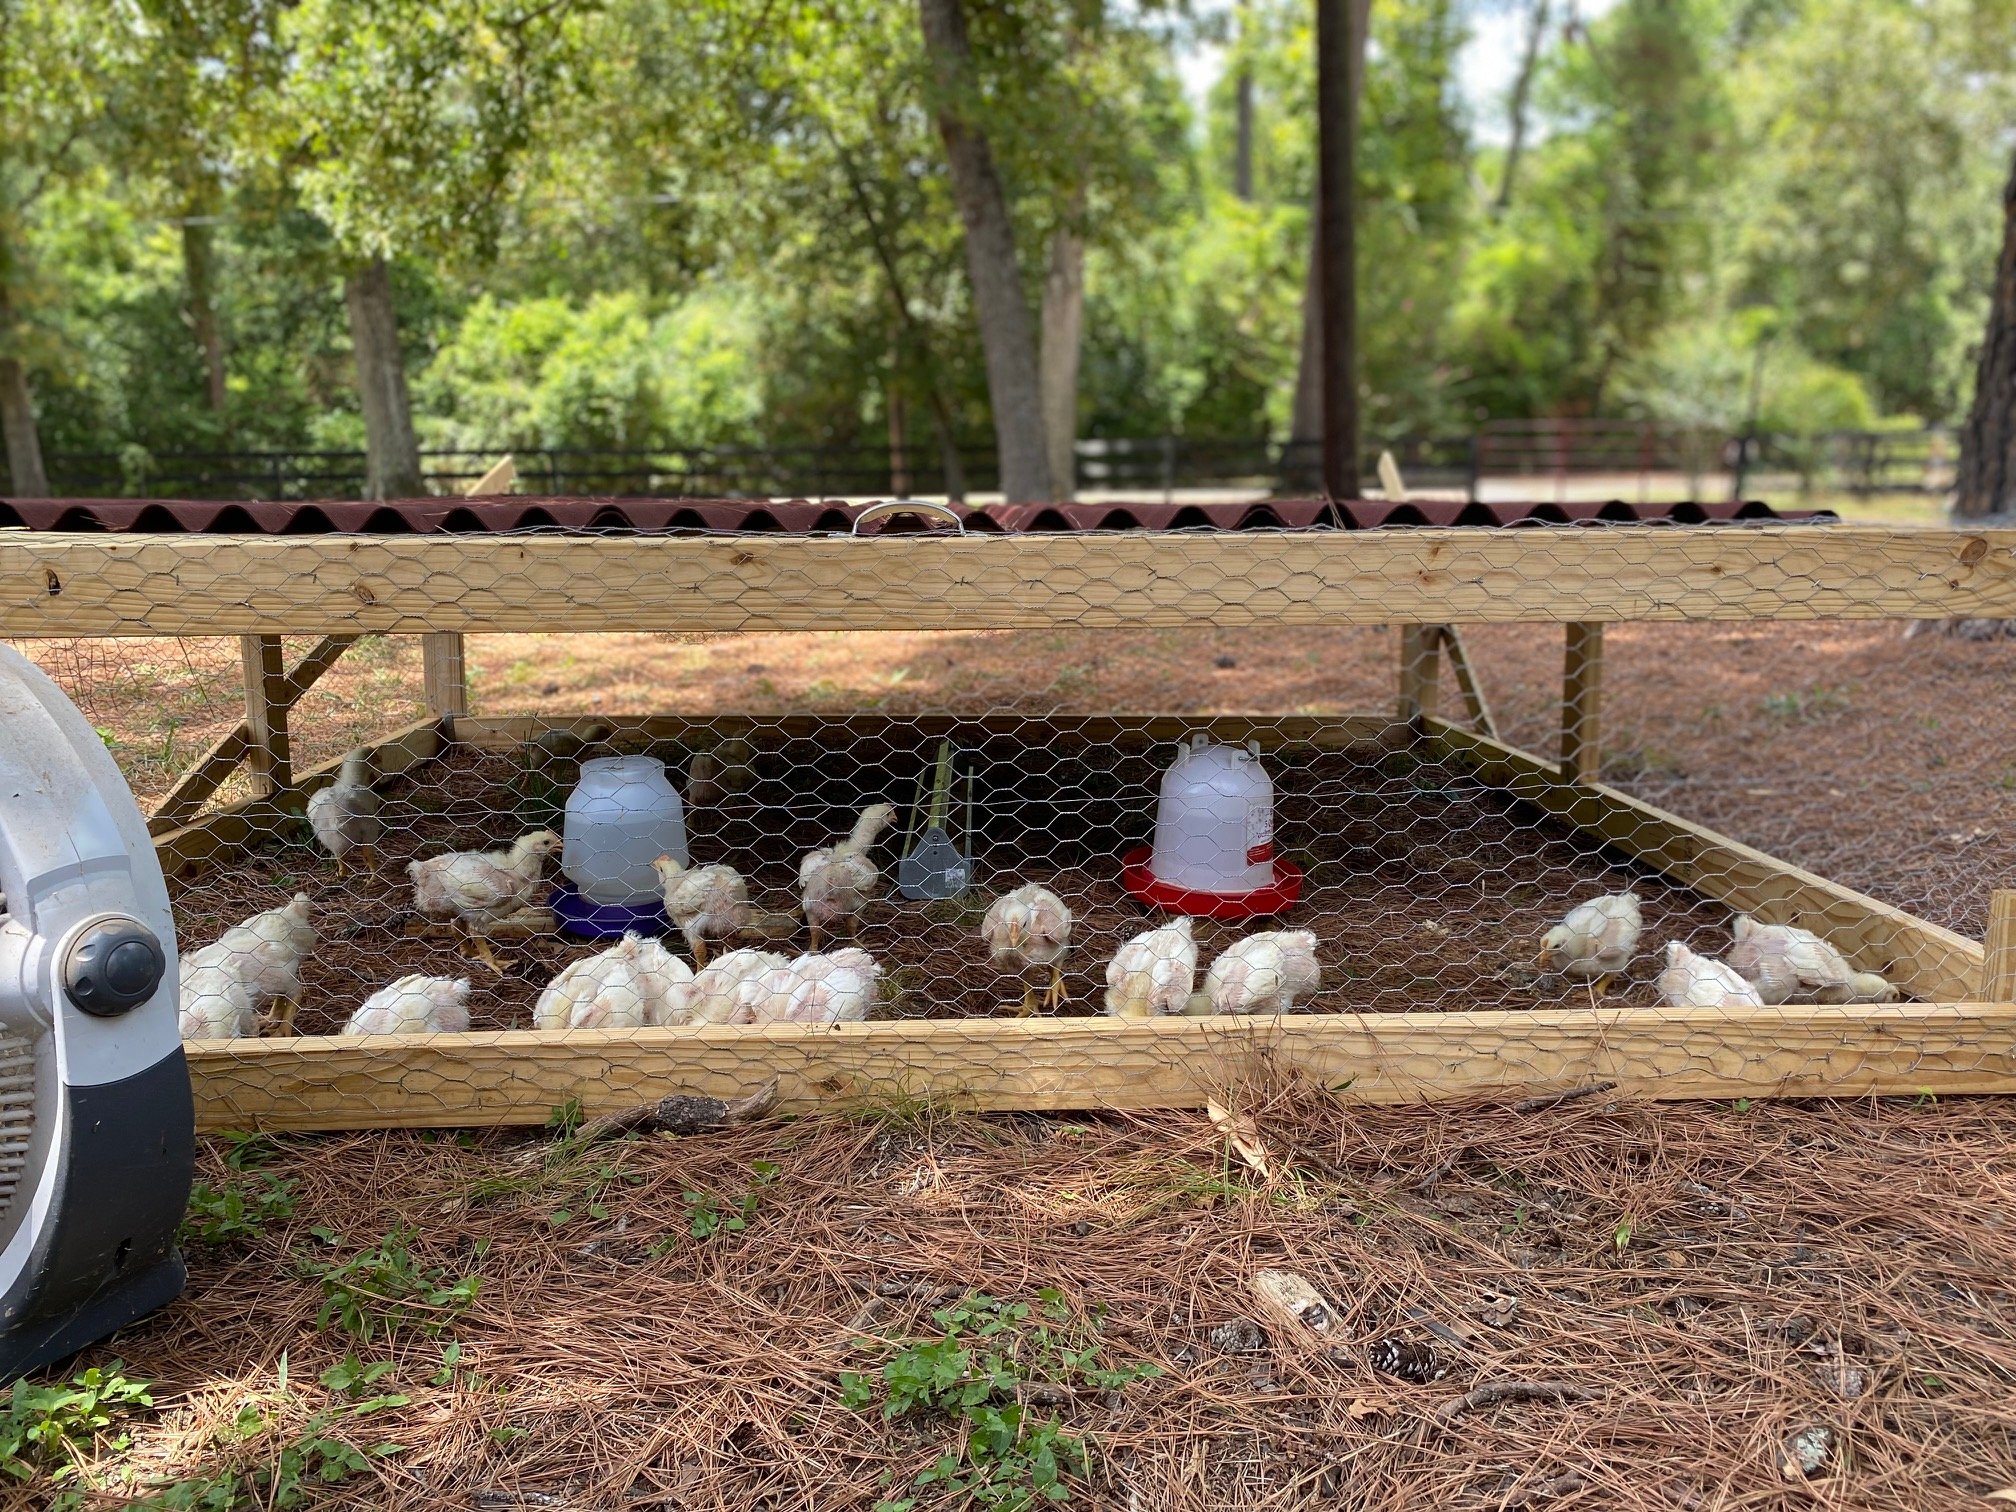
We have a few versions of the chicken tractor on our property and it’s such a convenient way to keep them safe, contained, and rotate quickly around the property.
We have a tractor for our meat birds, and recently, I just built a tractor for our turkeys as they were rapidly outgrowing our chicken tractor.
Using this type of “home” has 3 great benefits:
Protects our birds from predators
Protects our birds from the elements
Allows us to move them to a new plot of land easily on a daily basis. This means the birds are not only fertilizing our land but we’re helping keep the birds themself clean and giving them access to fresh grass and bugs without much fuss for us. If you haven’t raised any type of bird - this is a HUGE benefit because they can destroy your grass pretty quickly.

The Cut List
Don’t judge my rudimentary drawing! Best I can do.
These measurements are for an 8 foot and 2 inch by 8 foot base and a gradually sloped roof line (tallest point is 4 feet 4 inches and the shortest is 3 feet 6 inches).
It is extremely easy to tailor this though. I built a much shorter version weeks prior so when I built this one, I very quickly knew what I’d need and it was a breeze.
Quick things to consider:
How many birds and type of birds you’re housing will determine the size needed – do NOT overcrowd your birds! It can cause disease, stress on the plot of land in terms of food, and it’s not humane.
Material you’re using – I built one with all 2x4s and the roofing material was SUPER heavy. The thing is sturdy as all get out which is amazing, but it’s not easily moved by one person (even with wheels).
The Full Cut List & Other Items Needed (all wood used was 2x2x8 - using 16 total pieces will be the perfect amount for everything below.
Note that I used scrap wood for angled support so that is not accounted for with the purchase. If you don't have scrap wood, I'd add at least 2 1x2x8's pieces of wood for this)
10 uncut pieces of wood - Base & Roof Frame
3 pieces of wood cut to 4 feet each - Front wall (where the door will go)
3 pieces of wood cut to 3 feet 8 inches - Center Supports
3 pieces of wood cut to 3 feet 5 inches - Rear Wall
5 pieces of wood cut to 44 inches each - Door
4 pieces of scrap wood cut at 45 degree angles on each side - whatever size you're able - our supports are 30 inches - these will support the outer walls
4 pieces of scrap wood cut at 45 degree angles on each side @ 6 inches - these will support the base frame
2 Rolls of chicken 48 inch tall wire
2 Vinyl Roof Panels (3 if you'd like)
13 "L" brackets
2 Hinges
1 Lock
Screws - lots and lots of screws (2.5 inch and 1.5 inch were used)
Staples for your Staple Gun - LOTS and LOTS of staples to secure your wire
Optional - wheels, door handle, & additional roof panels to cover some of the sides (we did NOT do this yet but intend to add some to the rear for additional protection from wind and rain)

Base & Roof Assembly
Place your uncut pieces of wood on a flat surface
Use your 2.5 inch length screws to secure each piece of wood together
2 pieces of wood for the side and you'll place 3 pieces of wood positioned on the inside so that 2 pieces will be at top and bottom and 1 piece will be placed in the center at the 4 foot mark
Repeat for the roof
Place 4 of the 6 inch angled support in each corner of the base (not needed for the roof)

Wall & Roof Assembly
Using your "L" Brackets, secure your 4 foot pieces of wood to one side
You'll place them at equal lengths
Repeat for the shorter pieces of wood
You'll want to reinforce the attachments using one extra screw for each on the opposite side of the "L" bracket- I put ours in at an angle.
You'll end up with your 4 foot on one side, 3 foot 8 inch pieces in the center, and the 3 foot 5 inch piece at the other end
Now you can add your roof! This will require another person to help hold it in place
The roof will fit perfectly on the top of each post. Secure with a 2.5 inch screw on each support
Add your longer pieces of scrap wood to each outer wall corner - using your 1.5 inch length screws

Make Your Door
Using your 44 inch cut pieces of wood, assemble is in the same way you did the base and roof!
Use your "L" brackets to secure it on each corner and then follow it up with 1 2.5 inch screw through the tops
Cover with your chicken wire, securing with your staple gun
Attach your door to the frame using your 2 hinges
Now here’s where I truly hope you have an electric nail gun! You need to wrap your entire frame in chicken wire. This is pretty self explanatory so nothing elaborate here. Just ensure it's pulled taught. You do not need to cover the section of wire where your roofing material will go. You can, but I didn't. I recommend covering everything in wire before attaching the roof because you'll have overlap. Adding the roofing last allows you to easily pull the wire over the wood where needed. Plus, you have some added reinforcement of the wire on the back section.
Once your structure is wrapped, secure your roofing panels with some overlap over one another with roofing screws.
Add your lock to the door and a handle if you have it but this is optional.
Place your birds inside and that's it!
I will be adding wheels but I need some lawnmower vinyl material first to hide the roughly 3 inch gap the wheels will add. I'll also be adding more roofing to the sides but it's a great and sturdy structure for now so I'm not in a rush. Our turkey are much more comfortable in their new home!